Overview
The "custom" part of building a custom mechanical keyboard is what turns any standard keyboard into a personalized mechanical keyboard that was built for you and by you. There are some well-known modifications that could be made to your mechanical keyboard, including, but not limited to: force break mode, tape mod, holee mod, pe foam mod. These are mostly modifications that are done to the keyboard case itself.
One of the more essential modifications is hand lubing and filming switches. Hand lubing switches makes one of the biggest differences to the sound and feel of your custom mechanical keyboard. If can make the typing experience feel smoother as well as sound cleaner, and most of the time more thocky, getting rid of any potential unnecessary sounds like spring ping, leaf chatter, or scratchiness.
Here is a guide to hand lubing and filming linear switches for a smooth typing experience:
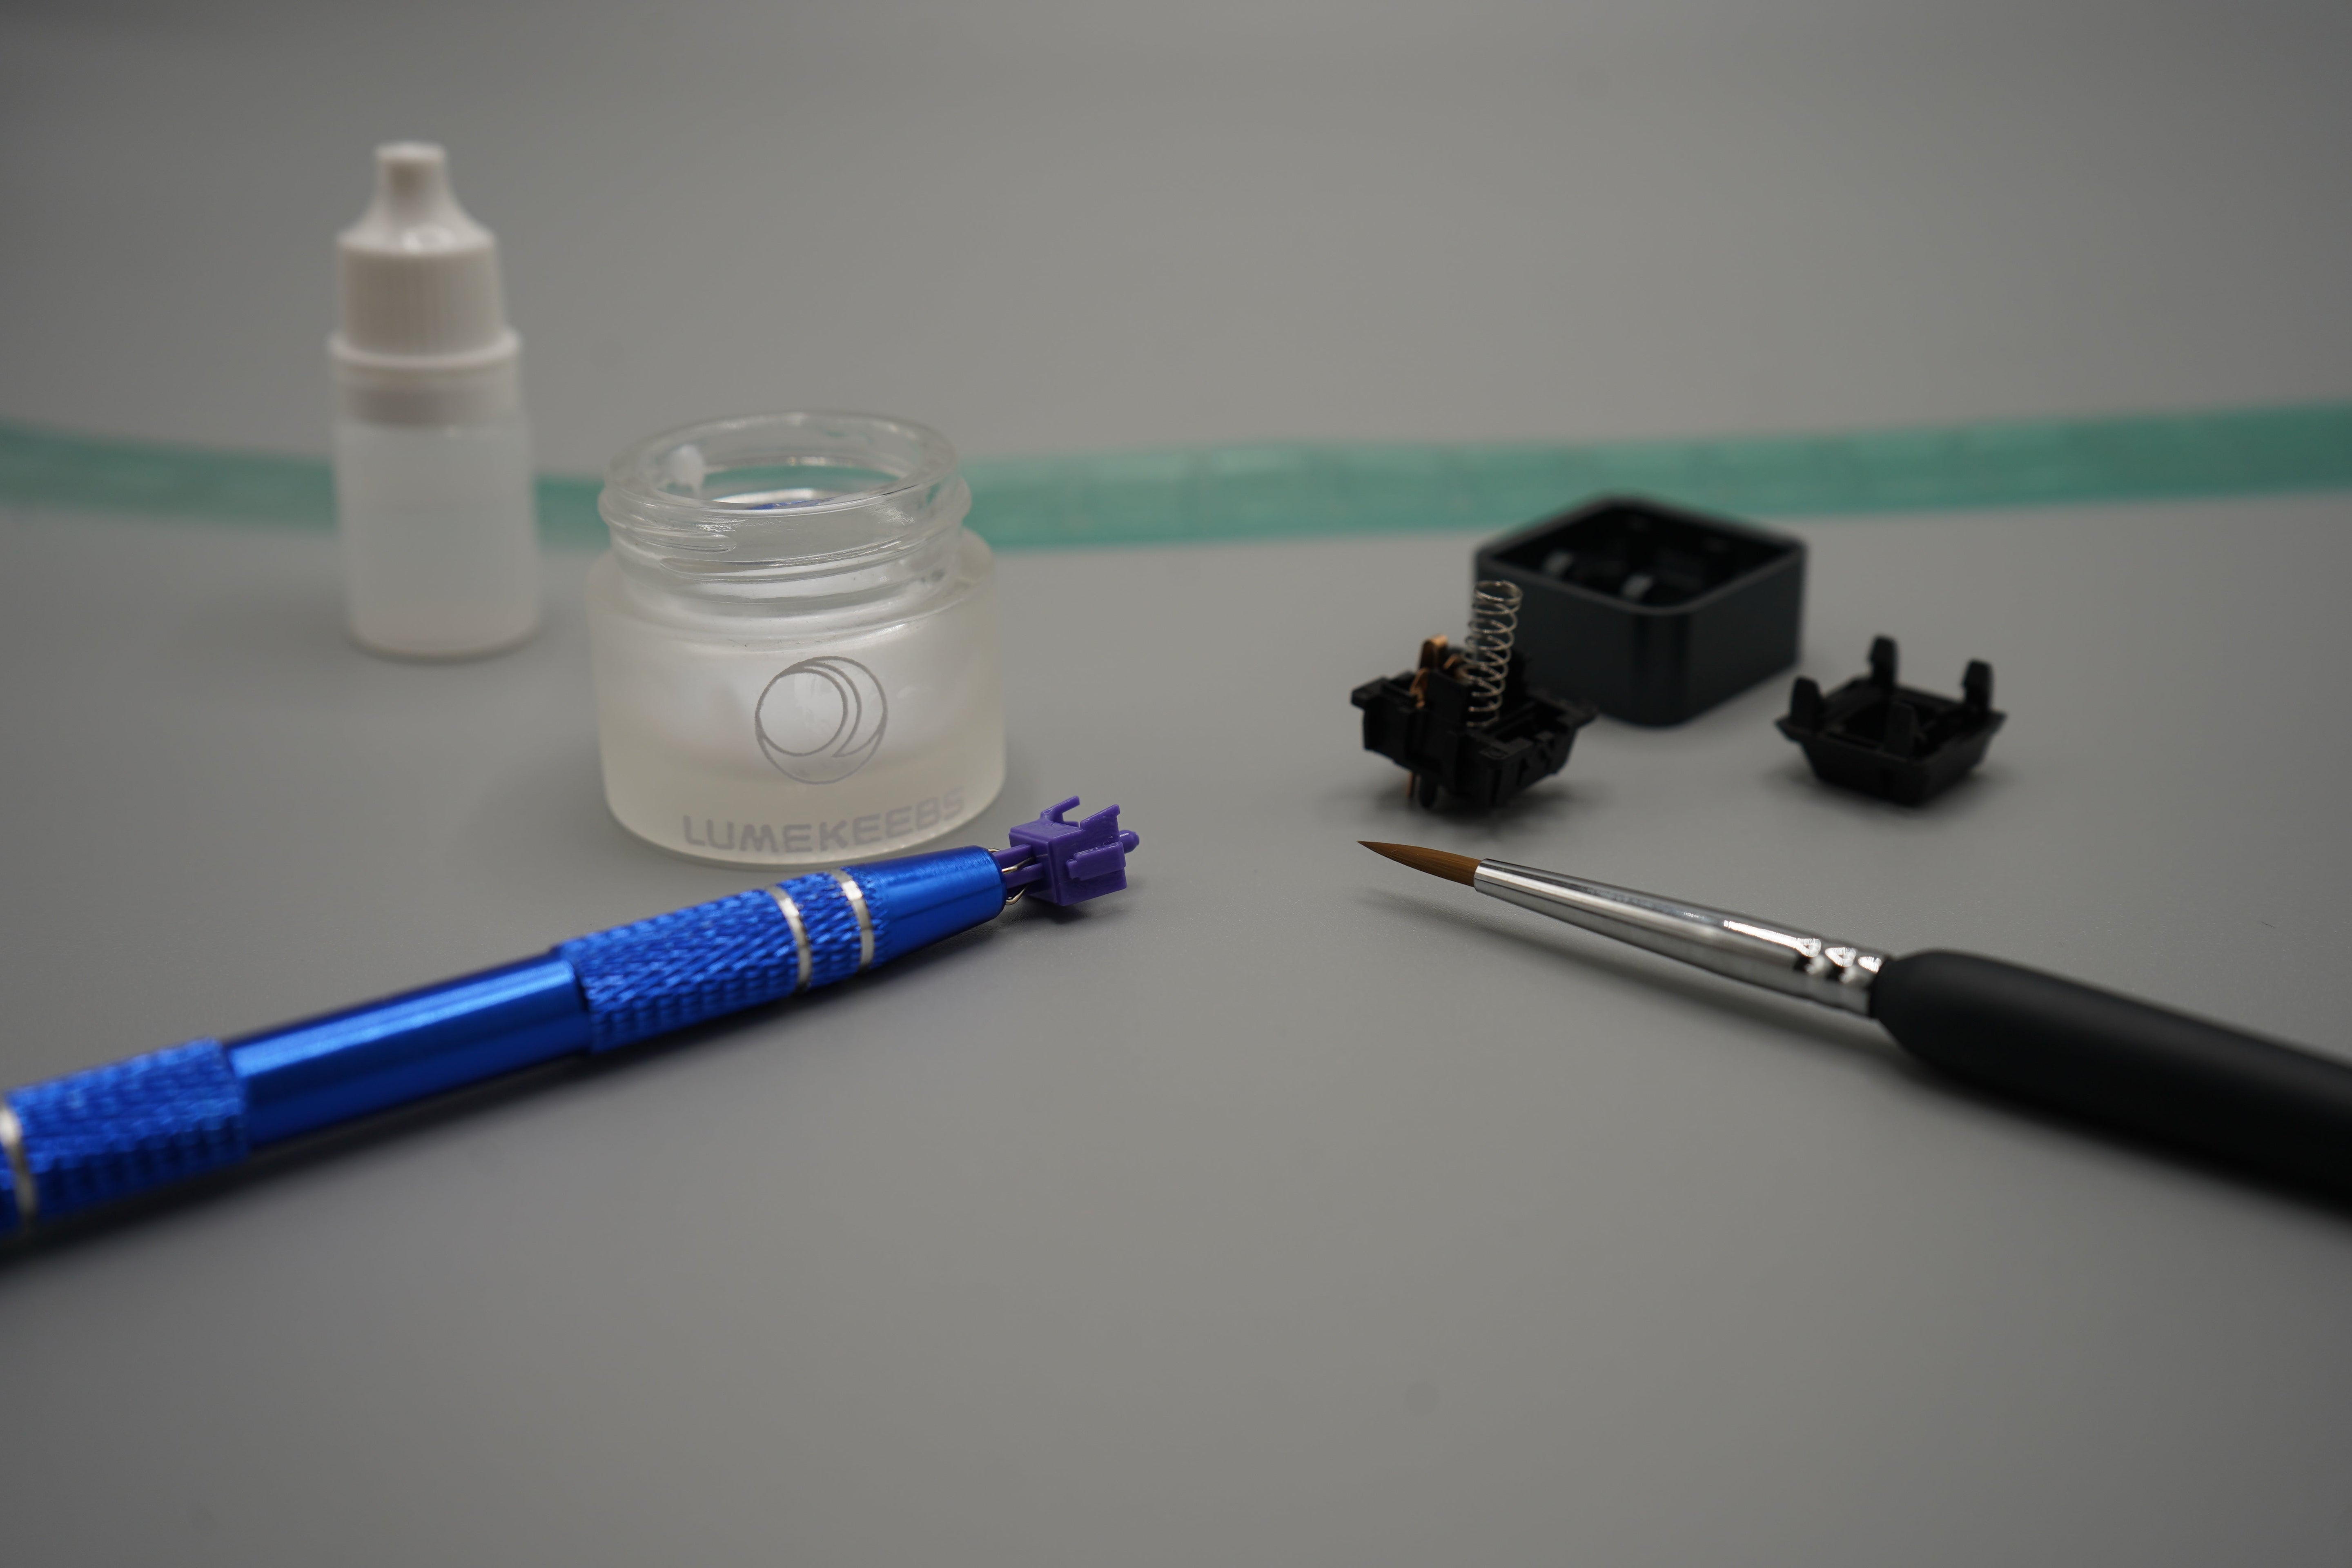
Step 1: Tools and Prep
- Switches of your choice
- Switch opener / Gateron switch opener
- Lube (205G0 for linear switches)
- Oil (GPL105 for springs)
- Spare plastic bag (optional for bag lubing springs)
- Tool kit (including switch stem holder, brush, and tweezers)
- Film (optional)
- Paper towel for clean up
Step 2: Open Switches and Separate its Components
Tools used: switch opener
Prepare a clean work area to begin. If it is your first time hand lubing switches, it might be helpful to attempt one switch at a time to learn how to lube the different parts of the switch and to find out what works for you. For efficiency, opening all of the switches and separating each component would be the first step to getting start with the hand lubing process. Use a switch opener to open each individual switch to help streamline the process. One thing to note is that you should check if the switch is an MX style design or a Kailh style design to make sure that the switch opener corresponds to the right switch, otherwise it won't be possible to open a switch with the wrong switch opener. The tool kit we have at LumeKeebs includes a dual sided switch opener that will work for both MX and Kailh style switches. If your switch is an MX style switch, then there is an additional option for a switch opener that could help speed up the process for some.
Step 3: Begin the hand lubing process starting with the bottom housing
Once you have separated all of the switch components, it is now time to start the hand lubing process. For beginners it could be helpful to start with lubing the bottom housing first. Using the brush, take some of the 205G0 lubricant (just about enough to cover just the tip of the brush) and apply half of the lubricant that is on the brush onto one of the bottom housing railings and the other half of the lubricant that is remaining on the brush on the other bottom housing railing. (NOTE: it is recommended to start with less lubricant and incrementally add more to your preference. Less is more since it is easier to apply more lube than it is to remove excess lube). Then gently brush in the lubricant by going in one direction until the lube is evenly distributed on the rails. There should be no clumps and there should be a clear sheen on the rails. For linear switches, you can also try applying lubricant on the metal leaves in the bottom using, once again following the rule of less is more.
Most switches in the current market come factory lubed and there might be some lube already on the rails. It is up to your preference if you want to wipe away the factory lube before applying your own, or if you want to apply the lube on top of the factory lube. For consistency it would be recommended to wipe away the factory lube.
Step 3.5 (OPTIONAL): Applying films
Tools used: tweezer
Adding switch films is up to your preference if it achieves your desired feel and sound for the finished switch.
The idea of filming switches is to create tighter tolerances between the top housing and the bottom housing of a switch that would essentially help to produce a cleaner and smoother typing experience from removing potential wobbling that may occur between the switch components.
Step 4: Lubing springs
Tools used: brush, tweezer, 205G0, GPL105
There are a few ways to lube springs, but we will go over 3 methods.
One additional tool that will be helpful for handling springs would be using a tweezer.
Method 1: bag lubing springs
This by far the easiest way to lube springs since it can be done in bulk. Take a plastic bag and add a few drops of GPL105 lubricant and add the springs into the bag. All you need to do now is shake the bag for the lubricant to be thoroughly dispersed among the springs and they are now prepped. It is also possible to use 205G0 as well by spreading a little bit on the bag and shaking as well, but for best results GPL105 lubricant is recommended
Method 2: Applying 205G0 to both ends of the spring
This method requires you to add 205G0 lubricant individually to each spring as you insert them back on to the bottom housing. This is done by adding a generous amount of lube on the ends of the spring and spreading it around the inside and outside of the spring.
Method 3: Donut dipping
This method is similar to method 2, however instead of using a brush to apply the lubricant, all that is needed is to carefully dip just the ends of the spring in some of the 205G0 lubricant so there is a ring of lube around the ends of the spring. Then insert each spring into the bottom housing.
Step 5: Lubing stems
Tools used: brush, stem holder, 205G0
Lubing the stems of the switch requires the most attention to care out of all the steps of lubing your switch. This is because it is the component that comes into most contact with all parts of the switch and the component that moves during typing.
Using the stem holder, grab one of the stems and then start by taking just enough lube to cover the tip of the brush (remember that less is more since you can always add more later) and apply half the lube on to one of the rails on the stem and the other half of the lube remaining on the brush on the other rail. Then using one motion, brush the lube consistently and thoroughly on one of the sides of the stem with rails and use whatever lube is left on the brush to then brush either the front side (side with the two prongs or legs of the stem) or the back side (flat side of the stem) of the stem. Then repeat with the other side with rails and use whatever lube is left from that side and apply to the last remaining side of the stem.
Once you are finished applying lubricant to all four sides of the stem, you can now insert it on top of the springs that should be already inserted on the bottom housing. NOTE: make sure the two prongs or legs of the switch stem are facing towards the metal leaf part of the bottom housing, otherwise you will risk damaging or break the switch.
Step 6: Assembling switches
Last step is to set the top housing on top of everything else and closing the switch! NOTE: make sure the taller side of the top housing (usually has the logo or brand of the switch) is facing in the same direction as the two prongs/legs of the stem and the metal leaf on the bottom housing. Once you have confirmed that the orientation of all the components is correct, push down evenly and make sure the switch is fully closed.
Cherry pick and randomly test a few of the switches to check if they are lubed and filmed to your liking before applying all the switches. This way if any adjustments need to be made, they can be made without having to fully assembled and the disassembled again.
Conclusion
Now you've learned how to hand lube and film switches! Just like everything else in this hobby, the amount of lube and the lubing methods are all preference so pick and choose what works for you.
NOTE: This guide for lubing switches is ONLY for lubing LINEAR switches. There is a small but important difference between lubing a linear switch and a tactile switch.
Other Reading
How to Mod Your Mechanical Keyboard for Better Sound and Feel
How to Build Your First Mechanical Keyboards: A Step-by-Step Guide
Ultimate HMX Switch Showdown: Sound Test & Switch Review
Top Mechanical Keyboard Layouts: Which One is Right for You?
HMX Cheese Linear Switch Review
Share:
Top Budget-Friendly Switches
Gateron Magnetic Jade Pro vs Magnetic Jade Max